Pumpkins and squashes,
unique shapes and textures, so characteristic of Autumn, full of
nutritional benefits, delicious recipes, easy to grow and beautiful
to photograph. And this is where we start.Episode #1 Why
do I shoot dark and moody images?
Because I love the way bold
shadows and bright
highlights
relate, creating a more intense contrast
that easily evokes emotions, and for me this is the magic, the
feelings and memories that food photography awakens in each of us.
Tips for creating a photograph with a darker environment:
1. A single
light source, such as a small window, or blocking the light from a
large window with boards or curtains.
2. Move the food away from the
light source a little to create richer, more intense shadows.
3.
Objects we lose between the light source and the subject create more
interest, but shadow and light play.
4. Directing the light towards
our subject, in this case I blocked the light at the back and front,
creating a line of light directed towards the subject.
In
this #howtogrowcookshoot Pumpkins, I will share different suggestions
for the various meals of everyday life: breakfast, lunch, afternoon
snack
and dinner. Stay with
me,
because if, like me, you like to combine pumpkin with other flavors
and textures, and feel that warmth, you are in the right
place!!
Episode
#2: Vegan
Pumpkin and Honey Pancakes, so
delicious, with a creamy
texture, oatmeal and a very autumnal touch.
Recipe:
½
cup
wholemeal
flour
½ cup
oatmeal
⅔ cup
pure pumpkin
½ cup
vegetable milk
1 Tbsp
linseed
+ 2 Tbsp
water (wait 20min)
1 tsp
honey
1 tsp
backing powder.
Method:
1. Grind all the ingredients (consistency
is
very creamy).
2. Heat a non-stick skillet over medium heat and place 3 Tbsp
of batter per pancake. When the edges are golden, turn with a spatula
and cook for a few more seconds.
3. Serve these Pumpkin Pancaques with lots of honey, because
they are delicious like that!!
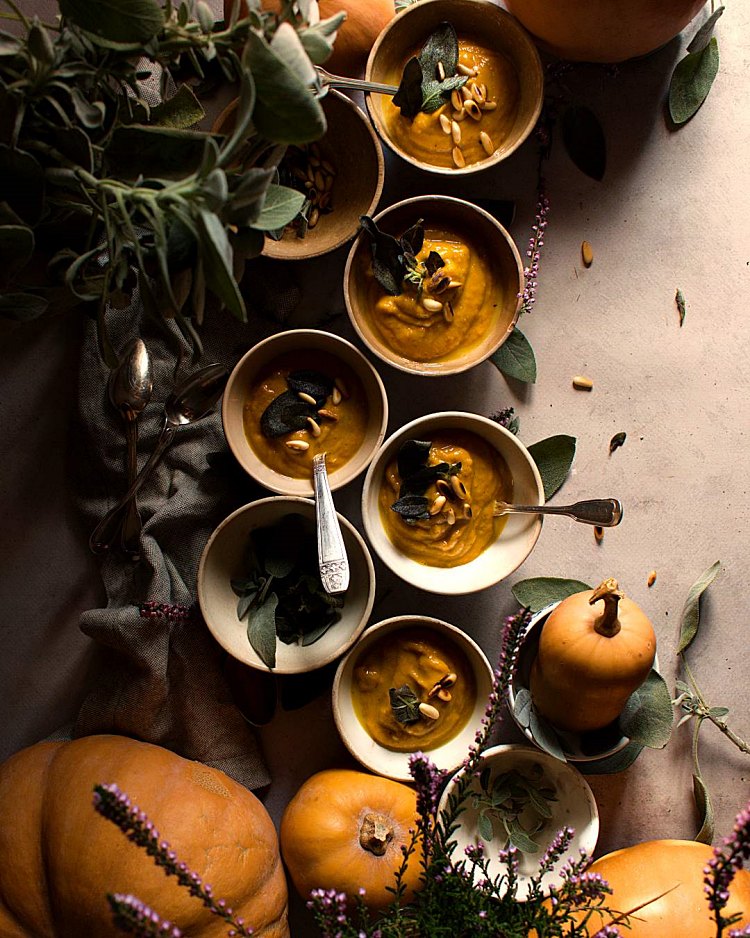
Episode #3 Roasted
Pumpkin Soup with Sage and Pine Nuts
Healthy / Creamy / Easy to Prepare
(serves 2)
1 medium onion, grossly chopped
3 crushed cloves of garlic
1 small butternut squash, with skin, cut into small pieces
1 drizzle of olive oil
1 tablespoon curry
1 teaspoon coriander
1 teaspoon of cumin
1 pinch of salt
200 ml of a liquid of your choice (water, milk, vegetable drinks)
Method:
1. Place all the ingredients, except the liquid ones, in an oven dish and mix well, in order to distribute the spices among the vegetables. Bake for 60 minutes, mix well in the middle cooking time.
2. Pass the vegetables with a magic wand or a blender and add the liquid you like best. In this case I added milk. Rectify the seasonings and serve hot with a little yogurt and pumpkin seeds.
Good warm and healthy moments!
Abóboras, bolinas, manteiga, japonesa, formas
e texturas únicas, tão características de Outono, cheias de
benefícios nutricionais, receitas deliciosas, fáceis de cultivar e
lindas de fotografar. E é mesmo por aqui que começamos.
Episódio#1 Porquê é que fotografo num estilo mais escuro? Porque eu adoro o modo
como as sombras fortes
e a luz se relacionam, criando um ambiente mais
intenso, que facilmente evoca emoções, e para mim a magia é esta,
os sentimentos e e memórias que a fotografia de comida desperta em
cada um de nós.
Dicas para criar uma fotografia com ambiente mais
escuro:
1. Uma única fonte de luz, como uma janela pequena, ou
bloquear a luz de uma janela grande com placas ou cortinas.
2.
Afastar um pouco a comida da fonte de luz para criar sombras mais
ricas e intensas.
3. Objetos colocados entre a fonte de luz e o
sujeito criam mais interesse, mas jogo de sombras e luz.
4.
Direcionar a luz para o nosso sujeito, neste caso, bloqueei a luz na
traseira e na frente, criando uma linha de luz direcionada para o
sujeito.
Episodio #2: Panquecas
de Abobora
e Mel Veganas, são mesmo deliciosas, com uma textura similar
a uma
queijada, com
aveia e com um toque bem outonal.
½
chav farinha integral
½ chav
aveia
⅔ chav puré abobora
½ chav leite vegetal
1 c sopa
linhaça+2 c sopa água (aguardar 20min)
1 c chá mel
1 c café
fermento
Método:
1. Triturar todos os ingredientes até obter uma
consistência bem cremosa.
2. Aquecer
uma frigideira antiaderente em lume médio e colocar 3 colheres de
massa por panqueca. Quando as bordas dourarem, virar com uma
espátula e cozinhar mais uns segundos.
3. Servir
com muito mel, porque estas panquecas ficam deliciosas assim !!
Episódio #3 Sopa de Abóboa Assada com Salva e Pinhões
Esta sopa é tão nutritiva, para saberem mais sobre os BENEFÍCIOS DA ABÓBORA MANTEIGA, explorem o artigo aqui no blog, mas posso já dar um cheirinho: permite a regulação do indicie glicémico e manutenção do peso saudável, contribui para uma pele e visão saudáveis e ainda desempenha um papel importante na regulação hormonal.
1 cebola média aos pedaços
3 dentes de alho esmagados
1 abóbora manteiga, com casca, cortada em pedaços pequenos
1 fio de azeite
1 colher de sopa de caril
1 colher de chá de coentros
1 colher de chá de cominhos
1 pitada de sal
200 ml de um líquido á escolha (água, leite, bebidas vegetais, caldo)
Preparação:
1. Numa travessa de forno colocar todos os ingredientes, exceto o líquido, e envolver bem, de modo a distribuir as especiarias pelos legumes. Assar por 60 minutos, envolver bem a meio da cozedura.
2. Passar os legumes com a varinha mágica ou num liquidificador e acrescentar o líquido que mais gostam. Neste caso adicionei leite. Retificar os temperos e servir quente com um pouco de iogurte e sementes de abóbora.
Bons momentos quentes e saudáveis!